that you often connect your computer/laptop to multiple wireless networks, e.g., friend house, work, coffee shop, etc. One thing that Windows allows you to do, that you may didn’t know, is to prioritize which wireless network connection your computer connect first.
If you want to change the priority in which your windows computerconnects to a wireless network follow these steps:
This tip should work in windows 7 and in Windows Vista.
1. Go to Start  , in the search box type Network and Sharing Center and press Enter.
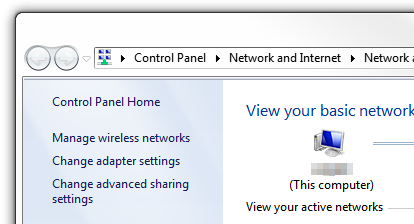
2. In the left pane of Network and Sharing Center, click the Manage wireless networks link.

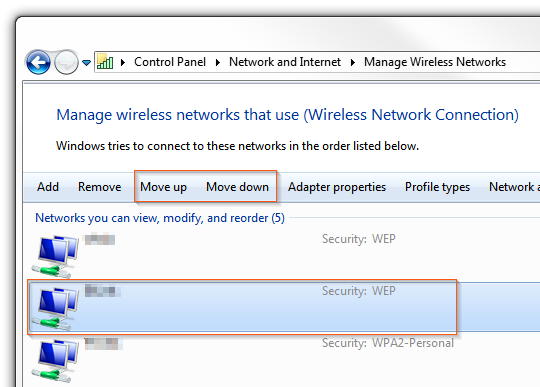
3. In the next window you will be presented with all the wireless networks that you have connected in the past. To change the priority of a specific wireless network, select the wireless network and in the top menu you will notice that two new options will appear, just click Move up or Move down to change the prioritization order (the first one being the wireless network with the highest priority).

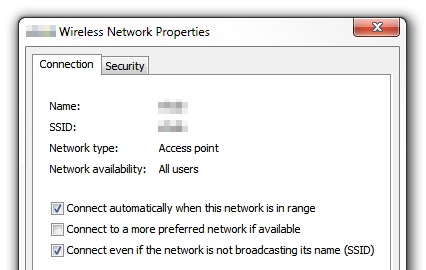
One more tip: In the case you want your computer to automatically connect to a specific wireless network, right-click the network and select Properties. While in the Connection tab, select Connect automatically when this network is in range. If the wireless network is hidden you can also check the Connect even if the network is not broadcasting its name (SSID) option.

For the old good Windows XP follow these steps:
1. Go to Start  and click Control Panel.
2. Double-click Network Connections.
3. Select and right-click Wireless Network Connection and select Properties.
4. Navigate to the Wireless Networks tab.
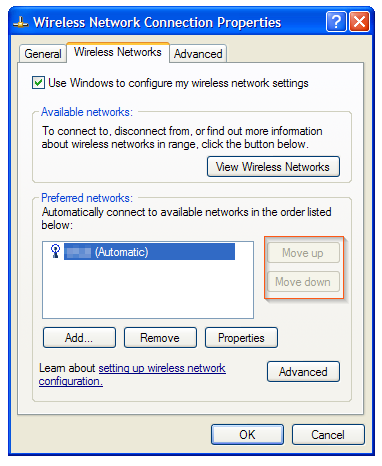
5. Under Preferred networks you will have a listing of all wireless networks, and to change thepriority just click the name of the wireless network you want, and then click the button Move up orMove down, then when you are done making your selections click the OK button.
Note that this computer happen to have only one wireless network, therefore the Move up and Move down button will be disabled. They will be enabled when I connect to a second wireless network.


